A) Using a plugin
http://sketchupplugins.com/plugins/convert-sketchup-skp-files-to-dxf-or-stl/
Import the plugin using Sketchup->Preferences->Extensions->Install Extensions. There is a warning so import at your own peril (I imported the plugin and then manually opened the .rbz file with a text editor and checked the code for any potential dubious file activities, it looked clean).
For laser cutter, needs to have the components lying flat on the floor, i.e. view from above or below and export using “lines”.
B) The manual way (slow and buggy) :
Put Sketchup into View->Face Style->WIREFRAME
Select the component(s) and create one large component.
1) Select the component and use the plugin Edit->Component->TF Make Shop Drawings to output a shop drawing style sketchup page. Save and open the drawings file
Or
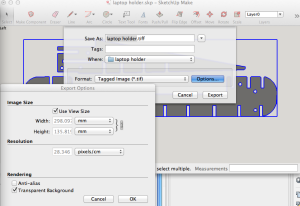
2) Select the required component, select Camera->Standard View->Left/Top/Bottom etc to get a face on view
File->Export->2D Graphic (TIFF image)
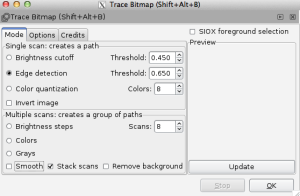
In Inkscape create a new file and File->Import the TIFF file.
Select the object and Path->Trace Bitmap using (untick Smooth unless you need it):
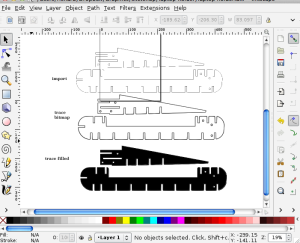
Select the Fill tool and Fill in black (black fill and black stroke width 1mm)
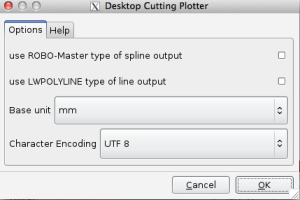
Save the file as a dxf (Didn’t use default LWPOLYLINE) :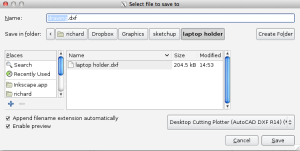
Ready for opening with LaserCut 5.3 (objects will need to be resized).

